What Is a Venue Walkthrough Explained: A Planner's Checklist
- 11 minutes ago
- 15 min read
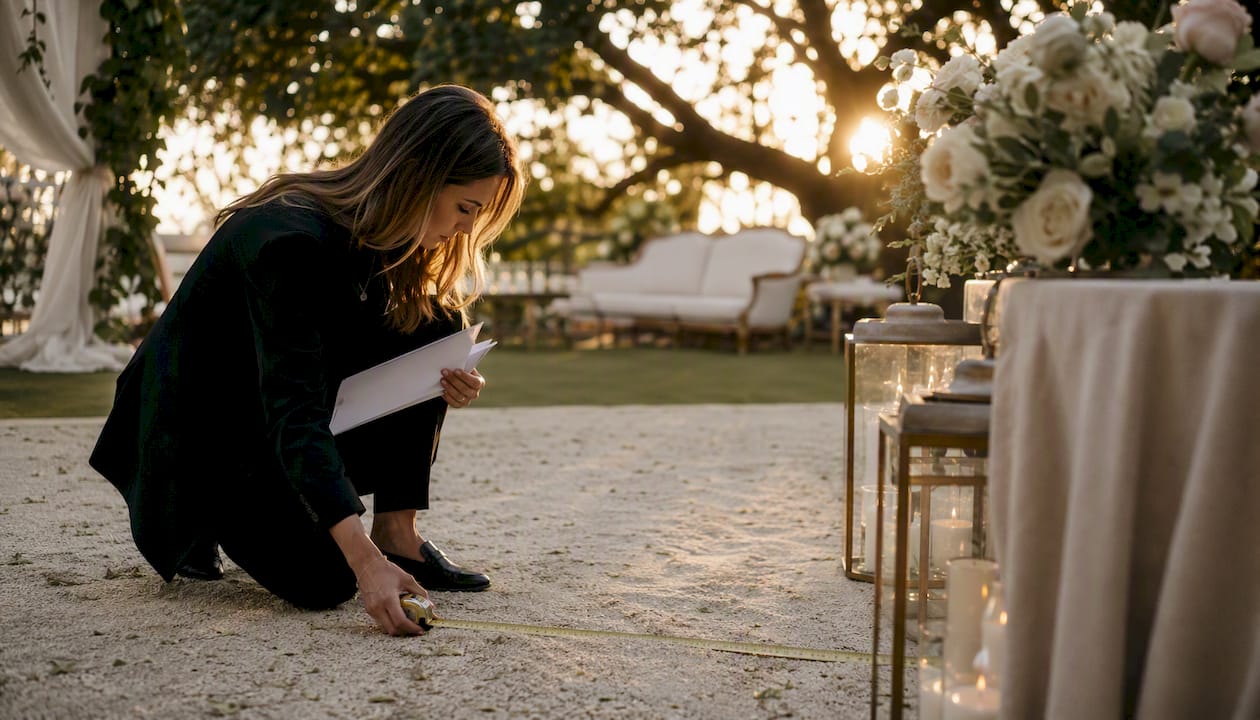
A venue walkthrough is a focused, on-site inspection you lead to verify a space can safely and practically host your event. It’s sometimes called a site visit, and it’s the moment where a floor plan on paper meets the actual room: the outlets, the sightlines, the loading dock, the bathroom that’s smaller than the photos suggested.
Here’s the bottom line. Before you walk in, request the floor plan, room capacities, and vendor list so you’re verifying details instead of asking basic questions on the clock. During the visit, physically trace the path a guest would take, from parking to seat, and test anything electrical or mechanical you plan to rely on. After you leave, send a written summary within 24 hours that confirms load-in times, AV responsibilities, and anything that changed from the contract.
A handful of checks matter more than the rest, and they’re the ones people forget under time pressure:
Confirm the exact load-in and load-out windows in writing, not verbally
Test every outlet you plan to use for lighting, AV, or a photo booth
Walk the guest path from the entrance to the ceremony or dance floor
Check the backup plan for weather, HVAC, or a power outage
Get the venue coordinator’s direct cell number, not a general office line
Key Takeaways
A venue walkthrough works because it converts assumptions about a space into confirmed, written facts before your event day arrives.
Point | Details |
Lead the walkthrough | Bring a printed checklist and set the agenda instead of following the venue’s standard tour. |
Separate the two visit types | Treat pre-contract visits as due diligence and pre-event visits as your final logistics pass. |
Test what you’ll rely on | Check outlets, HVAC, Wi-Fi, and AV with real equipment, not a verbal assurance it works. |
Confirm everything in writing | Send a summary within 24 hours documenting load-in times, AV plans, and any changes. |
Bring your photographer if possible | Pixelgroves attends final walkthroughs to lock in light, portrait spots, and power needs before the event. |
Table of Contents
When Should You Schedule a Venue Walkthrough?
Most couples and event hosts need more than one walkthrough, and each one serves a different job. Treating a pre-contract tour and a final logistics pass as interchangeable is one of the most common planning mistakes, because the questions you should ask at each stage are almost opposite.
The initial tour happens before you’ve booked anything. This is a sales conversation as much as an inspection, and the goal is simple: does this space fit your guest count, your date, and your budget? You’re forming a first impression, not finalizing details.
The pre-contract due-diligence visit comes next, ideally before you sign. This is where you protect your budget. Treat this visit as your leverage point: confirm what’s included versus what costs extra, ask about restrictions on outside vendors, and get a real sense of hidden fees before you’re locked into a contract. Skipping this step and moving straight to a final walkthrough means you’ve already lost your negotiating position.
The final walkthrough, sometimes called the logistics pass, is your last real chance to catch a problem before the event. This visit is typically scheduled 24 to 48 hours before an event for weddings and social events, though larger conferences and multi-day events often run this pass 24 to 60 days out to give vendors time to adjust. This is where you confirm sightlines, table spacing, and technical details rather than exploring options.
A few timing guidelines worth following:
Book the pre-contract visit before signing anything, even if the venue pressures you to decide fast
Schedule the final walkthrough close enough to the event that nothing changes afterward, but early enough to fix problems
Add a rehearsal walkthrough the day before for wedding ceremonies with a complex processional
If your event spans multiple rooms or floors, add extra time to each visit type
Who Should Attend the Venue Walkthrough?
The people in the room during a walkthrough determine whether decisions actually stick or get relitigated later by someone who wasn’t there. For a wedding or private event, you want a small, focused group, not a crowd.
The couple or hosts need to attend the final walkthrough at minimum. You’re the one who has to live with the seating chart and the ceremony backdrop, so decisions made without you tend to get reversed.
The planner or coordinator, if you have one, should lead the visit and keep it on schedule. They’re also the person best positioned to translate what you see into updates for the banquet event order (BEO).
The venue representative needs to be present for every walkthrough, not just available by phone. They’re the one with authority to confirm capacities, point out restrictions, and answer questions about the space’s mechanical systems.
Key vendors matter most for the final walkthrough. Bring your photographer or videographer if lighting and portrait locations are a priority, and bring your caterer if the kitchen access or staging area is unclear. An AV vendor should attend in person if your event relies on sound or projection, since power capacity and rigging points are easy to misjudge from a diagram.
Consider adding an accessibility representative if any guests use mobility devices, since ramps, door widths, and accessible restrooms are details that get missed when nobody on the walkthrough needs them personally.
Role | Attends which visit | Primary responsibility |
Couple or hosts | Final walkthrough | Approve layout, sightlines, and guest flow |
Planner or coordinator | All visits | Lead the agenda, document decisions, update the BEO |
Venue representative | All visits | Confirm capacities, policies, and mechanical systems |
Photographer or videographer | Final walkthrough | Check light, portrait spots, and power for gear |
Caterer or AV vendor | Final walkthrough | Verify kitchen access, staging, and power capacity |
How to Prepare for a Venue Walkthrough
Preparation is what separates a productive 60 minutes from a wasted afternoon. If you show up without requesting basic information ahead of time, you’ll spend half the visit gathering facts you could have had in your inbox the night before.
Ask the venue to send you these documents before the walkthrough:
A detailed floor plan showing outlets, doors, and fixed furniture
Capacity numbers broken down by setup style (banquet rounds, theater, cocktail)
The preferred or required vendor list, if the venue restricts outside vendors
Load-in and load-out windows for your specific date and time
A direct staffing contact for the day of your event
Professionals recommend requesting these items in advance specifically so the walkthrough itself becomes a verification exercise instead of an information hunt. You’ll cover far more ground in the same amount of time.
Bring physical tools, not just your phone. A printed checklist, a tape measure, and a notepad go further than they sound like they would. Taking notes exclusively on a phone during a site visit can read as disengaged to a venue coordinator who’s trying to gauge how serious you are, and it slows down a conversation that should move quickly. Bring your phone for photos, but keep a paper checklist as your primary tool.
Pro Tip: Send the venue your expected headcount, event format, and rough timeline before you arrive. A coordinator who knows you’re planning a 150-guest reception with a live band will flag power and layout issues you’d otherwise discover on your own, on the clock, with no time to fix them.
If you’re bringing a photographer, this is also the moment to loop them in on your engagement session checklist approach. Vendors who know what to look for beforehand ask sharper questions during the visit itself.
What Should You Inspect During the Walkthrough?
This is where most of your time goes, and it’s worth working through the space systematically instead of wandering. A structured checklist keeps the visit objective rather than a general impression you’ll have trouble recalling accurately a week later.
Space, flow, and guest experience
Walk the path a guest would actually take, from the parking lot or drop-off point to their seat. Event planners specifically recommend viewing the space through the eyes of a guest, tracing that entire route to check signage, accessibility, and climate control rather than focusing only on where the tables go. Check sightlines from the back row toward the ceremony spot or head table. Measure spacing between tables if you’re worried about a tight floor plan.

Logistics and access points
Find the loading dock or service entrance and note its dimensions if you have oversized rentals or a large photo booth arriving. Check elevator access if your reception is above the ground floor, and ask directly whether stairs are the only alternative during a power outage.
Technical infrastructure
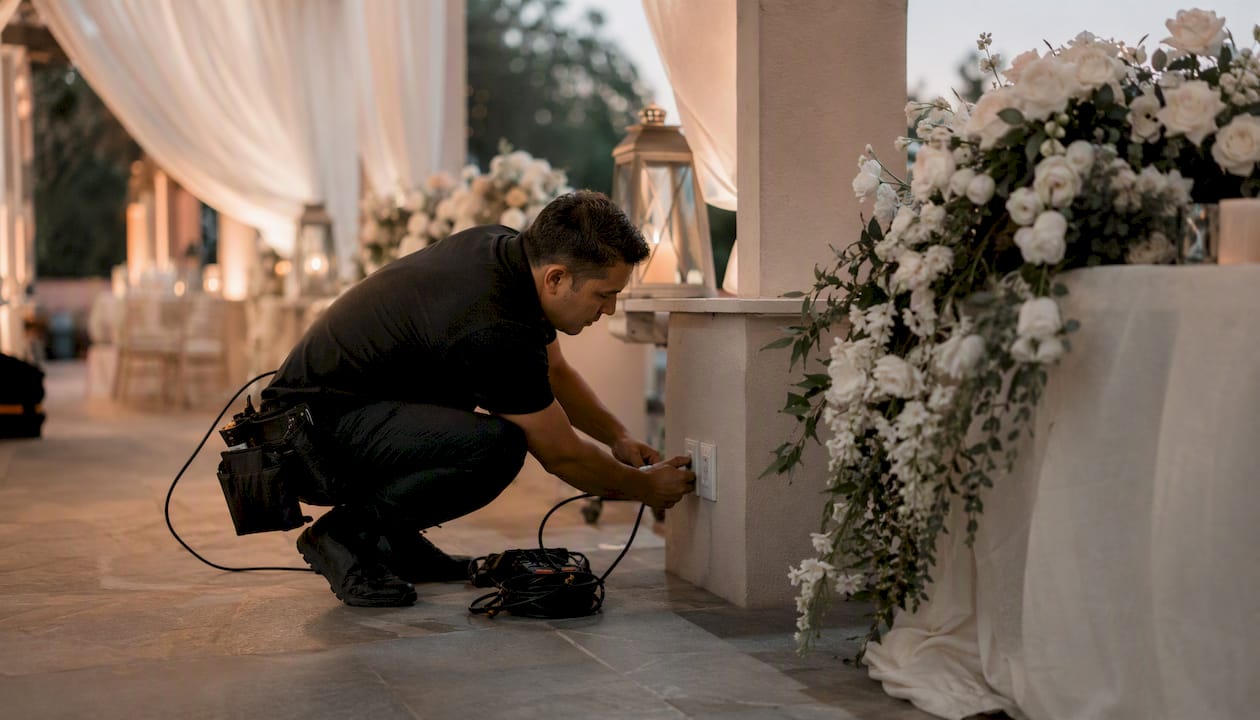
Count outlets in the rooms where you’ll need them and confirm which circuits they’re on, since overloading one circuit is a common cause of tripped breakers mid-reception. Site visits reveal acoustics, lighting behavior, and connectivity issues that virtual tours simply can’t show you, so test AV equipment on-site if the venue owns it, and check Wi-Fi or cell signal strength if your event depends on either.
Hospitality and safety
Check kitchen or catering staging access, restroom count and location, coat check space if the season calls for it, and parking capacity relative to your guest count. Locate every emergency exit, confirm ramp access if needed, and if you’re touring an outdoor space, ask directly what the weather contingency plan looks like and where the tent or indoor backup would go.
Room by room, here’s what to prioritize:
Main event space: capacity by setup, outlet locations, sightlines to any focal point
Ceremony space: seating capacity, aisle width, backup location for rain
Breakout or getting-ready rooms: mirror and outlet access, natural light, size
Kitchen: proximity to the reception space, staging area size, caterer access hours
Backstage or service areas: vendor staging space, restroom access for staff
Pro Tip: Ask a vendor to plug in real equipment during the walkthrough, not just a phone charger. A lighting or AV vendor’s actual gear will tell you immediately if a circuit trips. It’s also worth testing the HVAC and standing in the room for two minutes after adjusting the thermostat, since a venue can claim climate control works fine and still leave 150 guests sweating by hour two.
Questions to Ask the Venue During a Walkthrough
Some of the most expensive surprises in event planning hide in contract language nobody read closely, or in a policy the venue mentions only when you ask directly. Bring a specific list of questions rather than relying on general conversation.
Ask about operations first:
What are the exact load-in and load-out windows for my date, and is there flexibility?
How many staff will be on-site during my event, and what are their specific responsibilities?
Is there a noise curfew or sound limit, and how is it enforced?
Can vendors access the space before the official load-in window if needed?
Ask about contract and fee details next, since these are the items that generate disputes later:
What’s the overtime rate if the event runs past the contracted end time?
Is a service charge or gratuity built into the quote, and is it adjustable?
What insurance requirements apply to outside vendors?
What’s the cancellation policy, and does it include a force majeure clause?
Ask about technical capacity:
Is AV equipment included, or is that a separate rental?
What’s the maximum power draw available in the reception space?
Does the venue provide internet access, and is there an additional cost for bandwidth?
Pro Tip: If a venue gives you a verbal answer to any contract or fee question, follow up in writing: “Just to confirm what we discussed, overtime after 11 PM is billed at [rate] per hour, correct?” A short confirmation email creates a paper trail that protects you if a different staff member is on duty the night of your event.
How Long Does a Venue Walkthrough Take?
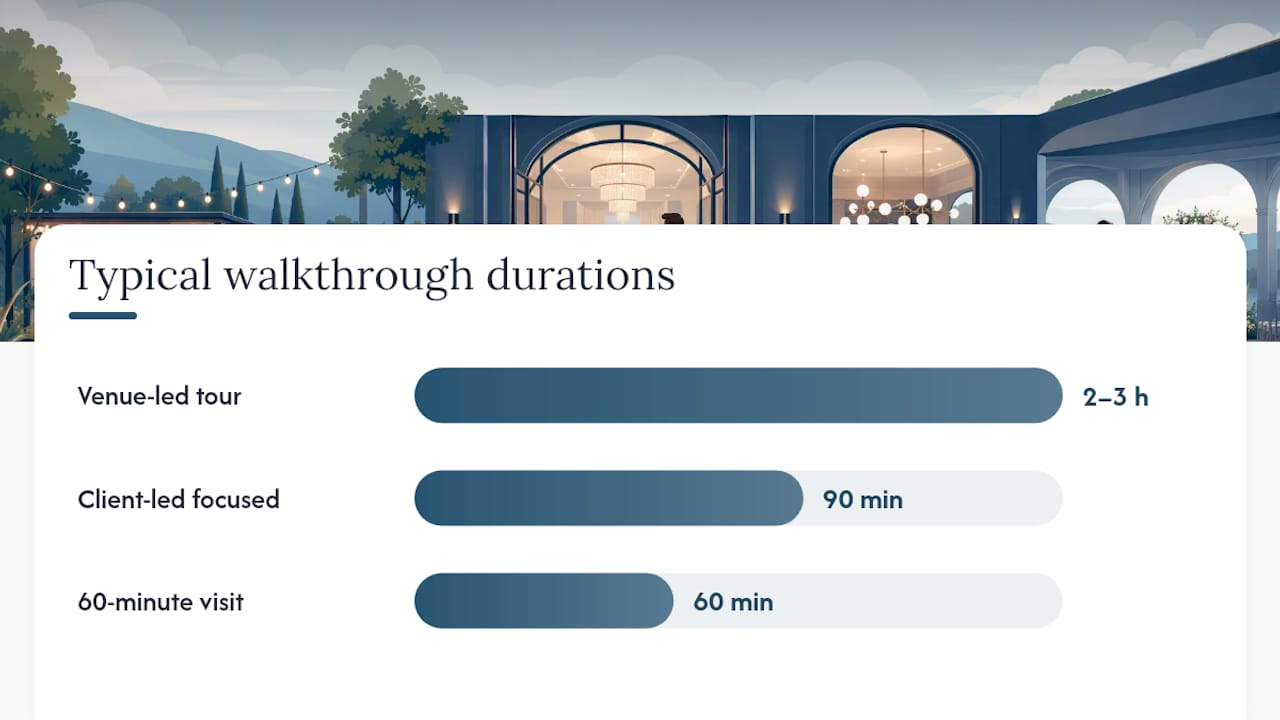
Duration depends heavily on who’s setting the agenda. A venue-led tour, where the coordinator walks you through their standard talking points, often runs two to three hours because you’re covering the venue’s priorities alongside yours. A client-led visit with a focused checklist can run closer to 90 minutes, because you’re only spending time on what actually matters to your event.
A widely used approach gives the venue the first 10 minutes for their pitch, then spends the remaining time on your list. Here’s how that breaks down across three common visit lengths:
Duration | Focus areas | Best suited for |
— | Capacity confirmation, sightlines, basic layout check | Small, simple events with few vendors |
60 minutes | Layout, outlets and AV, kitchen access, restrooms, parking | Standard weddings and mid-size events |
90 minutes | Full checklist: space, technical, logistics, contract review, vendor staging | Complex events with multiple vendors and setups |
Time of day matters as much as duration. If your event happens in the evening, tour the space in the evening, not at 10 AM, so you see the actual lighting conditions and hear how the room sounds once mechanical systems like HVAC are running under load. A daytime tour of an evening reception venue tells you almost nothing about how the space will feel when your guests arrive.
A few scheduling notes worth keeping in mind:
Match your walkthrough time of day to your event’s actual time slot whenever the venue allows it
Build in extra time if you’re touring multiple spaces within the same building
Don’t schedule back-to-back venue visits on the same day if you can avoid it; details blur together
Using the Walkthrough to Finalize Layout and Logistics
The walkthrough only pays off if you convert what you observe into locked decisions before you leave. Wandering through a space and nodding along accomplishes nothing if nobody writes down what was agreed.
Use the visit to finalize your seating plan, confirming exact table placement against real sightlines rather than a diagram. Decide where the stage, dance floor, and registration or check-in table will sit, and mark those locations on your printed floor plan so there’s no ambiguity later. Settle signage placement while you’re standing in the actual hallway or lobby where guests will need direction.
Assign vendor responsibilities on the spot where possible. Decide the load-in order for vendors arriving the same day, since two trucks trying to use one loading dock at the same time creates a delay nobody planned for. Confirm which power access points belong to which vendor, and mark staging locations for equipment that needs to sit somewhere before setup begins.
Someone needs to own updating the BEO after this conversation, and it should be decided before you leave the building. Usually that’s your planner or coordinator, but if you’re planning without one, that responsibility falls to you. Whoever updates it should distribute the revised version to every vendor within a day or two, not wait until the week of the event.
What to Do Immediately After the Walkthrough
The walkthrough itself is only half the job. What you do in the following 24 hours determines whether your verbal agreements hold up or dissolve into confusion on event day.
Send a written summary to the venue coordinator within 24 hours of the visit. Be specific rather than general: “Load-in begins at 5 AM through the north service entrance; our AV vendor will use the stage-left power drops; the venue confirmed HVAC will be set to 68 degrees by 4 PM.” A written confirmation like this becomes the reference point everyone works from, and it prevents the frustrating situation where the venue’s memory of a conversation differs from yours.
Update every vendor brief and the master timeline based on what changed during the visit. If the caterer’s staging area moved, tell the caterer directly rather than assuming they’ll see it in a shared document. Request the venue’s sign-off on any BEO revisions in writing, even if it’s just a one-line email reply confirming they agree.
Keep your photos, your annotated floor plan, and your measurement notes attached to every follow-up email. If a dispute comes up two months later about whether a hallway was wide enough for a specific rental, a photo with a measurement noted on it settles the argument faster than anyone’s memory.
Send the written summary within 24 hours, not “sometime this week”
Attach photos and the annotated floor plan to your follow-up email
Get written confirmation on anything the venue verbally agreed to change
Distribute the updated timeline to every vendor, not just the ones directly affected
Special Situations That Change the Checklist
Not every event happens in a traditional banquet hall, and the standard checklist needs adjusting for a handful of common edge cases.
Private homes require extra attention to details a commercial venue handles automatically. Confirm parking capacity and whether neighbors need advance notice, since a home wedding with 100 cars showing up on a residential street creates problems fast. Check whether local permits are required for amplified sound or a tent structure, and verify the property’s actual restroom capacity against your guest count, since most homes aren’t built for 80 people using two bathrooms.
Outdoor spaces need a genuine weather contingency, not a vague promise that “it usually doesn’t rain.” Ask specifically where a tent would go, how ground protection works if the site turns muddy, where a generator could be placed if there’s no reliable power source, and whether local noise curfews affect your evening timeline.
Multi-venue days, common when the ceremony and reception happen at different locations, add a transit variable that a single-site walkthrough doesn’t account for. Time the actual drive between locations at the time of day your event will happen, not according to a map app’s optimistic estimate, and coordinate with vendors about staging equipment at both sites.
Venues with strict vendor lists limit your options but aren’t necessarily a dealbreaker. Ask directly whether exceptions are possible for a specific vendor you already trust, and if the venue holds firm, get every restriction in writing before you sign, so you’re not discovering the limitation after you’ve already booked your photographer or caterer.
What Photographers Look For During a Venue Walkthrough
Your photographer sees the space differently than everyone else in the room, and their observations during a walkthrough often shape decisions nobody else thought to make.
Photographers use walkthroughs to confirm portrait locations, check available light at the actual time photos will happen, and verify power access for camera gear and lighting equipment. A room that looks great at noon can turn harsh and unflattering by 5 PM, and a photographer walking the space in advance catches that before it becomes a surprise during your ceremony.
A photographer’s walkthrough checklist typically includes:
Where natural light will fall during the ceremony and reception hours
Backup portrait locations in case weather or crowding rules out the first choice
Ceremony sightlines from the position they’ll shoot from
Outlet access for battery chargers and off-camera lighting equipment
Ideal spots for formal portraits that won’t be crowded by guests or staff
Coordination matters as much as the checklist itself. Vendors need to know where they can stage equipment, which outlets are theirs to use, and roughly when they should arrive relative to load-in, so nobody’s setting up lighting gear in the middle of a florist’s arrangement window.
Pro Tip: If your photographer can attend the final walkthrough in person, they’ll often shape your timeline decisions in ways that save real stress later. Knowing exactly when the light in your reception space turns golden, for example, can shift your first-dance timing by 20 minutes and change your entire photo coverage plan. If you haven’t set your day-of schedule yet, a groom prep timeline built around the venue’s actual light conditions is worth reviewing before the walkthrough, not after.
Why This Step Gets Skipped, and Why That’s a Mistake
The venue walkthrough is the least glamorous item on most planning checklists, and that’s exactly why it gets rushed or skipped entirely. Couples are excited about flowers, dresses, and menus. Nobody dreams about checking circuit breakers.
But the events that run smoothly almost always share one trait: someone stood in the actual room, at the actual time of day, and asked uncomfortable questions before the contract was signed or the guests arrived. The events that fall apart tend to share the opposite trait: a coordinator promised something verbally that never made it into writing, or a couple assumed a room’s afternoon light would look the same at 7 PM.
What people underestimate is how much of event planning is really risk management disguised as logistics. A walkthrough isn’t about picking the prettiest room; it’s about finding the problems before they find you on the one day you can’t fix them.
How Pixelgroves Fits Into Your Walkthrough Plan
A photographer who joins your final walkthrough sees things a floor plan can’t show: where the afternoon sun turns your ceremony backdrop harsh, whether the reception hall has a dead corner nobody would pick for portraits, and exactly how much power your lighting setup will need without tripping a breaker mid-reception.
[
Pixelgroves builds walkthrough attendance into how we approach wedding photography coverage across Florida, because timing decisions made in the room, not guessed at from photos, are what keep your day-of schedule realistic instead of aspirational. If you’re planning a wedding and want a photographer who treats your venue walkthrough as part of the job rather than an afterthought, check our pricing and packages and get in touch about your date.
Frequently Asked Questions
What is a venue walkthrough, explained simply? A venue walkthrough is an in-person visit to an event space where you check the layout, technical systems, and logistics against your specific event plan, rather than relying on photos or a floor plan alone.
How is a venue walkthrough different from a venue tour? An initial tour is usually a sales-focused introduction to a space, while a walkthrough later in the process is a detailed, checklist-driven inspection meant to confirm logistics before the event.
How long before the event should the final walkthrough happen? For weddings, final walkthroughs typically happen 24 to 48 hours before the event, while larger events sometimes schedule this pass 24 to 60 days out to give vendors time to make changes.
Who absolutely needs to attend the final walkthrough? At minimum, the couple or hosts, the venue coordinator, and any lead vendor whose work depends heavily on the space, such as a photographer, caterer, or AV provider.
What should I bring to a venue walkthrough? Bring a printed checklist, a tape measure, a notepad, and your phone for photos. Request the floor plan, room capacities, and vendor list from the venue in advance so you’re verifying details, not gathering them.
What’s the most common mistake people make during a walkthrough? Treating it as a casual visit instead of a working session. Skipping the written follow-up afterward is a close second, since verbal agreements without documentation tend to unravel by event day.
Sources
Recommended
Comments