DIY $80–$150 Photo Booth Guest Book or Hire for a Finished Keepsake
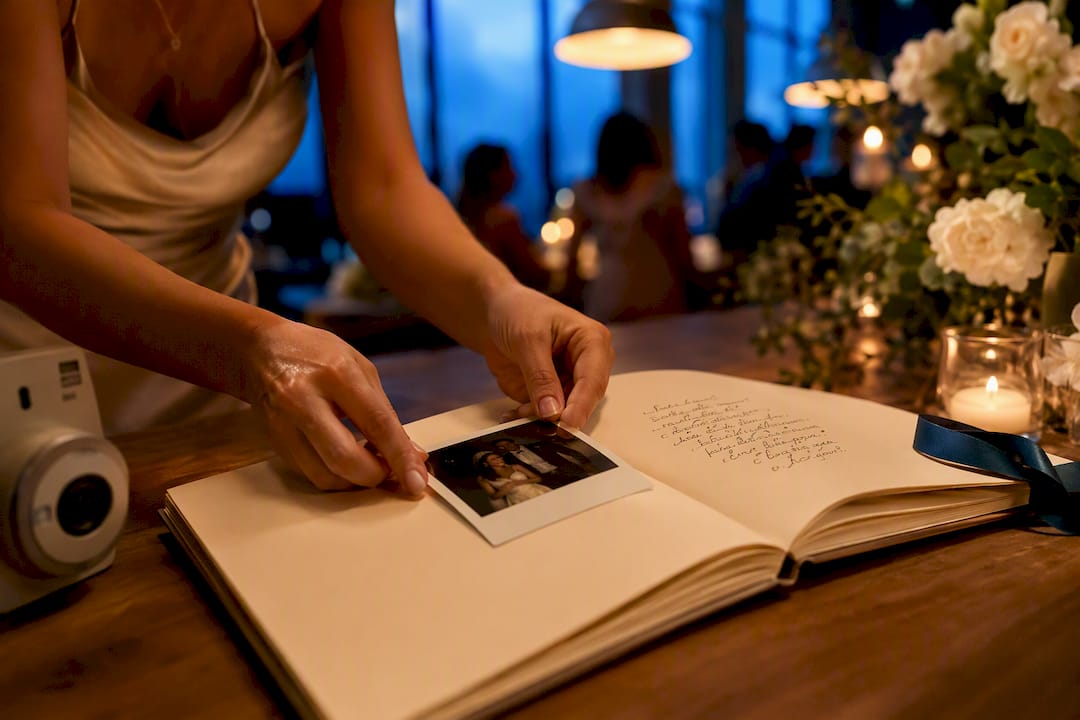
If you want the least effort, buy a ready-made Polaroid or scrapbook album and run a simple self-serve station. If you want a finished keepsake handed to you before the reception ends, hire a staffed scrapbook technician for $150 to $400 more than a basic rental. Budget $80 to $150 for a full DIY setup, and consider a company that bundles the photo booth with your wedding coverage instead of managing it separately.
TL;DR:
Using a Polaroid guest book is best for low-budget weddings with casual guest participation, requiring minimal setup and no staffing.
Staffed scrapbook services offer a finished, mounted keepsake before the reception ends, ideal for couples who want no post-wedding assembly.
Photobook formats vary from large strip scrapbooks needing space and an attendant to portable Polaroid albums suitable for DIY setups.
Buying a vendor-built album with a photo booth rental costs more but includes staffing, while marketplace albums save money but require self-assembly.
Placing the guest book station in a high-traffic, well-lit area near the bar or dance floor encourages maximum guest participation.
Table of Contents
Which Photo Booth Guest Book Option Fits Your Priorities?
The right choice depends on what you’re actually optimizing for: money, guest participation, or a polished final product. Here’s how the main routes stack up against each other.
Priority: simplicity and low cost. A Polaroid guest book wins here. Guests snap their own instant photo, stick it in the album, and scribble a note next to it. No staffing, no rental fee, minimal setup time.
Priority: a finished keepsake, no assembly required. A staffed scrapbook add-on is the answer. A technician mounts each strip during the event and hands you a completed book before the last dance ends, so you’re not spending your honeymoon gluing photos into an album.
Priority: control over design, mid-level effort. Ready-made albums and starter kits split the difference. You pick the cover, the paper weight, the layout, and you or a friend manage the station.
Priority: candid, unposed shots over polished ones. Disposable cameras scattered on tables, or a digital upload station where guests text photos to a shared number, produce a rawer, less curated result than a booth setup.
None of these is objectively “best.” A Polaroid station at a 60-person backyard wedding does a different job than a staffed scrapbook service at a 200-guest ballroom reception. Match the option to your guest count, your budget, and how much you personally want to manage on the wedding day itself. If simplicity and guest participation matter more than a flawless final product, skip the staffing and go simple. If you want something bound and finished by the time you leave the venue, pay for the attendant.
How Do Photo Booth Guest Book Formats Actually Differ?
Not every guest book works the same way, and the format you pick changes both the guest experience and how much footprint and staffing you need on-site.
Strip scrapbooks use a classic photo-booth strip (four small images in a vertical column) mounted next to a note from the guest. This is the format most open-air rental booths default to, and it needs the most floor space because you’re running an actual booth with a curtain or backdrop, a camera stand, and often a small line.
Polaroid albums skip the booth entirely. Guests use an instant camera themselves, wait a minute for the print to develop, then mount it. This format needs almost no footprint, just a small table, but it depends on someone occasionally swapping film packs.
Digital and print hybrids let guests take a photo on a tablet or phone-based kiosk that prints instantly, combining the speed of digital capture with a physical result. These need a power source and usually a small footprint similar to a Polaroid table.
Audio and photo combos pair a photo strip or Polaroid with a recordable voice message, either through a simple audio guest book phone or a QR code linking to a voice note app. Guests get a physical photo page plus an audio memory, though this format takes the most explaining to older guests.
Strip scrapbooks: highest footprint, best for guided guest flow, ideal with an attendant.
Polaroid albums: lowest footprint, best for casual and DIY setups.
Digital/print hybrids: moderate footprint, good middle ground for tech-comfortable crowds.
Audio/photo combos: moderate footprint, highest novelty, needs the clearest signage.
Pro Tip: Skip glue sticks. They yellow, wrinkle photo paper, and lose their hold within a year. Use archival-quality double-sided tape and acid-free pages instead, and the book will still look sharp a decade from now.
Where Should You Buy a Photo Booth Guest Book Album?
Marketplace albums and vendor-built guest books solve different problems, and knowing the difference saves you from overpaying or under-buying.
A marketplace album, sold on sites like Walmart or Etsy, gives you a blank product: a bound book with slip-in sleeves or adhesive pages, sometimes personalized with foil lettering on the cover. You supply the photos, the pens, and the labor. A vendor-built guest book, by contrast, comes bundled with a photo booth rental and includes an attendant who assembles it live, which is why it costs meaningfully more than the album alone.
Before you buy any album, confirm four things:
Page size. Match it to your print format; Polaroid squares need different sleeve dimensions than standard 2x6 photo strips.
Binding type. Screw-post albums let you add or rearrange pages later; sewn bindings look nicer but are permanent.
Paper weight. Anything under 80 lb. cardstock tends to buckle once photos and adhesive are added.
Sleeve compatibility. If you’re using an instant camera, check that the album’s sleeves fit that specific film size (Polaroid and Instax dimensions are not interchangeable).
Personalized covers, embossing, or foil-stamped names typically need three to four weeks of lead time, longer during peak wedding season (April through October). Order the album at least six weeks before your date to leave room for a reprint if something arrives wrong.
How Do You Set Up a DIY Photo Booth Guest Book?
Running your own station is straightforward once you break it into stages. Here’s the sequence that keeps things from falling apart mid-reception.
Two weeks out: test your camera and buy film. Instant cameras eat through film faster than people expect. Buy at least two packs (16 to 20 exposures) per 50 guests, plus one spare battery pack or set of AAs.
One week out: assemble your supply kit. Pack the album, tape, pens, a small tray or basket for props, and a printed sign. Do a dry run: take one photo, mount it, write a sample note.
Designate a helper. Ask a bridal party member or a relative who isn’t in the wedding party to check on the station twice during the reception. This is the single biggest fix for a station that runs out of film or gets messy.
Day of, during setup: build the physical space. Set up a small table near your chosen high-traffic spot with the album open to a fresh page, tape and pens laid out, and a sign propped up or taped to the table edge.
During the event: let the flow run itself. The workflow should be three steps: take the photo, stick it in, write a note. If guests need to ask how it works, the setup is too complicated. Open the station during cocktail hour so guests use it before dinner distracts them, and check it again right after the first dance when energy is high and people are mingling near the tables.
End of night: seal the book. Have your designated helper collect the album before guests start leaving, and store it somewhere dry, not in a car trunk overnight, since temperature swings warp adhesive and curl photo paper.
Within the first week after the wedding: review and press. Flip through, press down any lifting corners, and consider photographing each page as a digital backup before the album gets handled repeatedly.
Pro Tip: Write a one-line sample note on the very first page before guests arrive. People copy the format they see, so a short, funny opening note sets the tone for everyone after.
Where Should You Place the Guest Book for Maximum Use?
Placement decides whether your guest book fills up or sits untouched, more than budget does. A $60 Polaroid setup in the right spot beats a $400 booth tucked in a corner, every time.
Put the station in a visible, high-traffic area: near the bar, the reception entrance, or the edge of the dance floor. Vendor placement guides consistently recommend at least 8x8 to 10x10 feet of clear space around the table so it doesn’t create a bottleneck when a group of guests all want to use it at once.
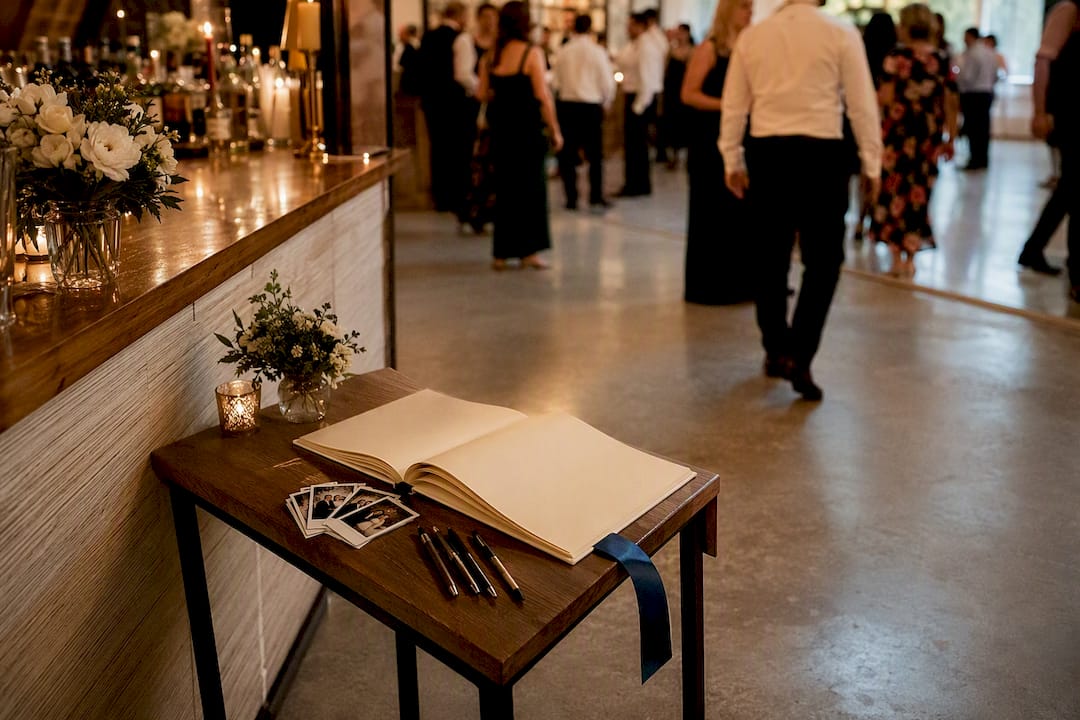
Lighting matters almost as much as location. Avoid direct backlighting from a window or string lights directly overhead, both wash out instant film. A soft, front-facing light source, even a simple ring light clipped to the table, makes a visible difference in how flattering the prints turn out.
For sign copy, keep it under ten words and give one clear directive. Three that work well:
“Snap a pic, stick it, write us a note!”
“Take a photo. Leave us a memory. ↓”
“Photo + note = one happy couple. #SmithWedding2026”
Short, directive signs consistently outperform longer instructional ones, and matching the sign’s font to your invitation suite makes the station feel intentional rather than bolted on. If your guest list skews older, size the font up and keep the sentence even shorter; subtle signage gets missed by guests who aren’t scanning for it.
An attendant earns its cost when your guest count climbs past 100 or your family includes a lot of guests who’ll need help using an instant camera for the first time. Below that number, a well-placed DIY station with a helper checking in twice usually does the job.
What Supplies Do You Actually Need to Buy or Pack?
Here’s the shopping list, sized to guest count so you’re not overbuying or running out mid-reception.
Album size: a 40 to 60-page album covers 75 to 100 guests comfortably; go up to 80 pages for 150+ guests.
Adhesive: archival-quality double-sided photo tape, not glue sticks or rubber cement.
Pens: metallic gel pens write cleanly on dark or patterned album pages and resist fading better than ballpoint ink.
Camera backup: two extra film packs per 50 guests, one spare battery pack, and a lens-cleaning cloth.
Props: simple items work best (paper signs on sticks, a couple of hats, oversized sunglasses) since elaborate prop tables slow the line down.
Staging: a small table, a tablecloth, and a stand or frame to prop the instruction sign upright.
Vendor-supplied guest-book add-ons typically include tape, pens, and mounting supplies as part of the package, so double-check what’s already covered before you buy duplicates.
What Should You Budget, and When Should You Order?
A DIY Polaroid station realistically runs $80 to $150 total: camera, film, album, and basic props. That’s often the best value on this list if you have a friend willing to manage it.
An open-air photo booth rental with a staffed scrapbook add-on typically costs more than a bare-bones booth rental, with the increase driven by attendant hours, print costs, and travel to your venue. What pushes the price up:
Attendant hours. A technician working the full reception costs more than one booked for two hours.
Print volume. Unlimited prints per guest cost more than a capped number per group.
Travel distance. Vendors outside your immediate area often add a mileage or travel fee.
Custom or personalized albums need three to four weeks of lead time; rush orders sometimes exist but usually carry an added fee and aren’t guaranteed during peak season. Order your album the same week you book your photo booth rental, so both arrive on a matching timeline.
An attendant delivers the most value at guest counts over 100, at multigenerational weddings where some guests need help with the camera, or any time you want the album finished and readable before you leave the venue.
What We’ve Learned Running Photo Booths at Real Weddings
Pixel Groves specializes in wedding photography and videography built around each couple’s specific story, and that same attention carries into how we approach a photo booth setup: not as a rented gadget, but as another piece of the day’s storytelling. Our team has picked up a few patterns worth passing on.
Couples happiest with their guest book aren’t necessarily the ones who spent the most. They’re often those who matched the format to their actual guest list, casual crowd, and casual station.
A staffed scrapbook add-on makes the most sense when a couple wants zero post-wedding assembly work. We assemble the book live during the reception so it’s finished before guests leave.
Recognition like our 2025 Best of Florida Wedding Photographer Award reflects the same standard we bring to a photo booth: personalized service, not a one-size setup dropped off and forgotten.
If you’re weighing a staffed add-on against DIY, reach out through our photobooth page or check current pricing before you commit either way.
The Honest Take: Stop Overthinking the Format
Most of the advice out there treats the guest book decision like a design problem: which album, which font, which theme. It isn’t. It’s a placement and simplicity problem, and almost everyone gets that backwards.
I’ve seen couples spend weeks agonizing over a $200 leather-bound album that sat untouched all night because it was tucked behind the gift table. Meanwhile a $12 Polaroid album on a well-lit table near the bar filled up in two hours. The book itself matters far less than whether guests can find it, understand it in five seconds, and use it without asking someone how.
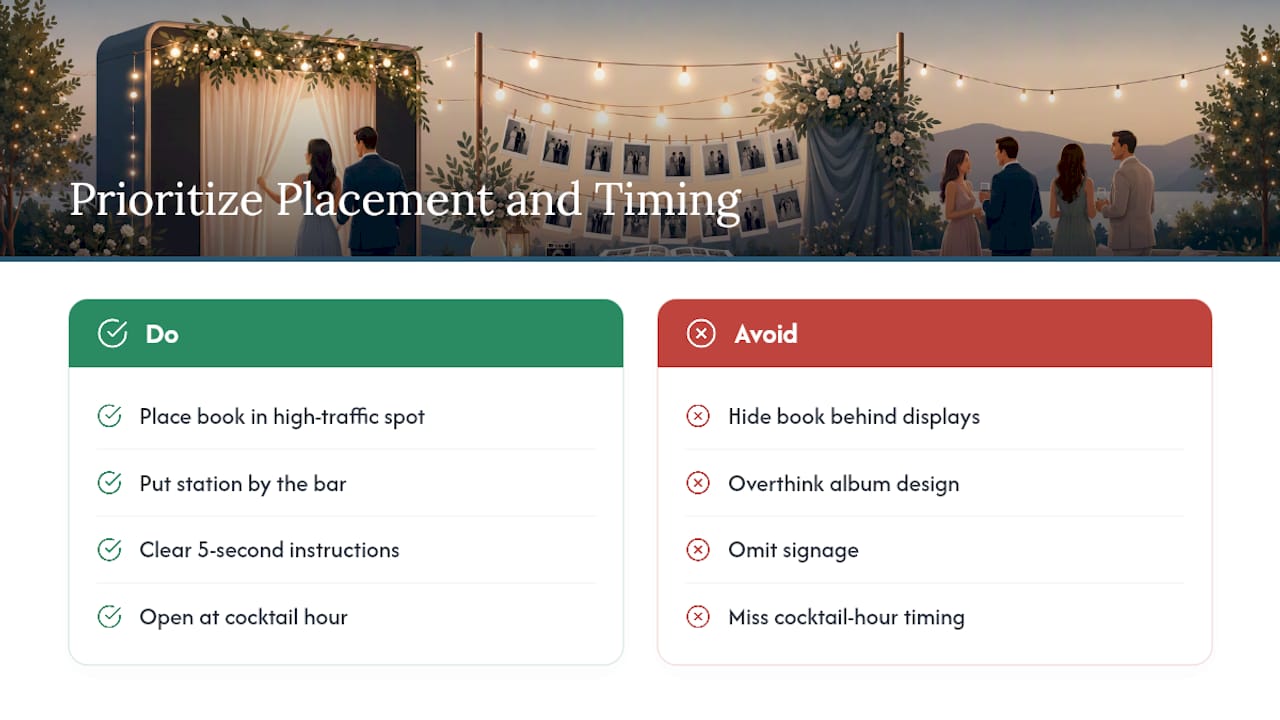
Where the conventional advice really fails is timing. Everyone talks about the album and the props and skips the two windows that actually drive usage: cocktail hour and the stretch right after the first dance. Miss both and you’ll spend the rest of the night chasing guests to use a station they’ve already forgotten exists.
Prioritize the spot before the supplies. Everything else, the pens, the tape, the cover design, is a distant second.
— Kellie
Let Pixel Groves Handle the Photo Booth While You Enjoy the Day
Pixel Groves is the alternative to juggling a separate photo booth vendor, a separate album order, and a separate rental contract on top of your wedding photography. Book us for wedding-day coverage and add a staffed scrapbook photo booth to the same package, one point of contact, one team already on-site, and a finished guest book handed to you before the night ends.
[
That matters more than it sounds. Coordinating a DIY station or a standalone rental company means someone on your side has to manage setup, film supply, and pickup logistics on the one day you have zero bandwidth for logistics. With Pixel Groves, the same team capturing your ceremony and reception also runs the booth, restocks it, and mounts the pages, so nothing falls on a bridesmaid’s to-do list.
If a staffed scrapbook keepsake sounds like the right fit after everything above, check our wedding photography styles and current pricing and packages to see how a photo booth add-on slots into your coverage, then reach out to lock in your date.
Sources
Recommended
Comments